Horizon 2212 New Feature App Volumes Apps on Demand Overview and Configuration
Overview
One of the latest enhancements in Horizon View 2212 released in January of 2023 is horizon apps on demand. Apps on Demand is a feature in Horizon View 2212 that seeks to address several challenges associated with managing applications in a remote desktop session host (RDSH) environment. One of the primary challenges is the friction involved in the app update process, which can be time-consuming and result in delays and inefficiencies. Apps on Demand solves this by centralized management of applications delivered to generic farm images. Isolation between app and operating systems is key here.
Requirements for Published Apps on Demand
- Horizon 2212 Connection Server
- Horizon Agent 2212
- App Volumes Manager 2212
- App volumes Agent 2212
Apps on Demand Visualized
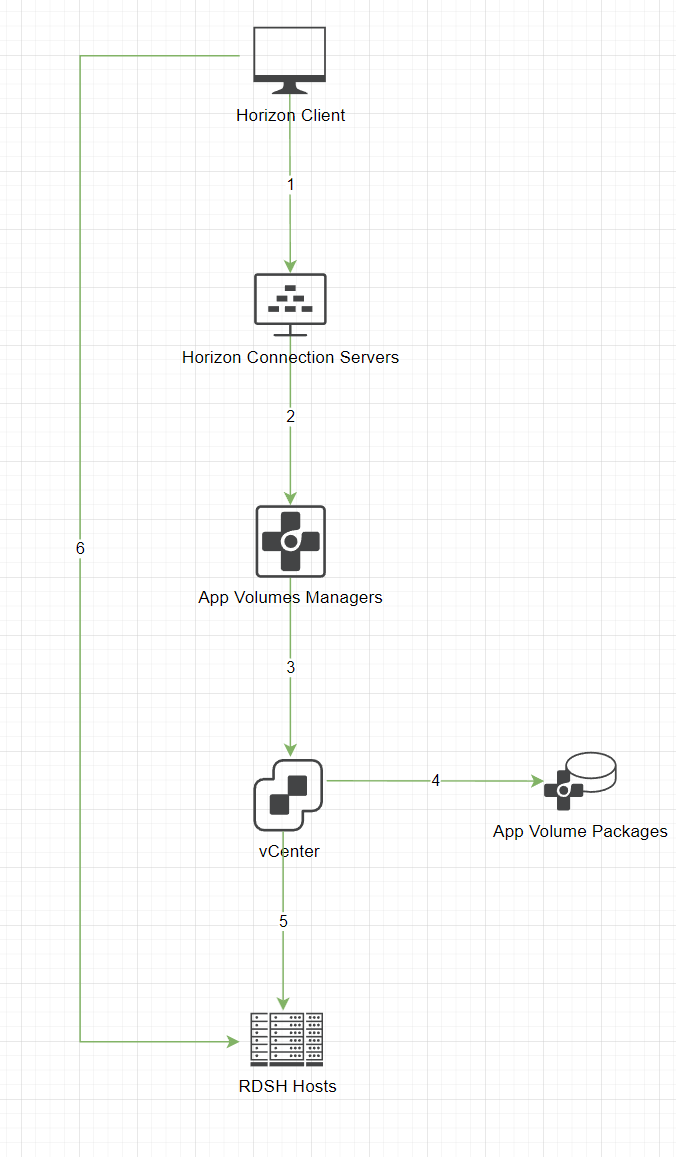
In the illustrated image below, you can see that applications are delivered to the user in real-time on demand. The green outline represents a single gold or generic image. A new RDSH host could only be stood up when the host reaches a configured threshold capacity. Once again, the farm is not being built around the required applications.
Example of user launch of published application on demand
- User selects the application from the Horizon Client.
- The Horizon Connection server communicates with the App Volumes Manager to request the application be attached to an RDSH host.
- Now the request for an attachment is sent to the vCenter.
- The disk with the app is now attached to the RDSH host.
- User is now connected to the application.
Configuration
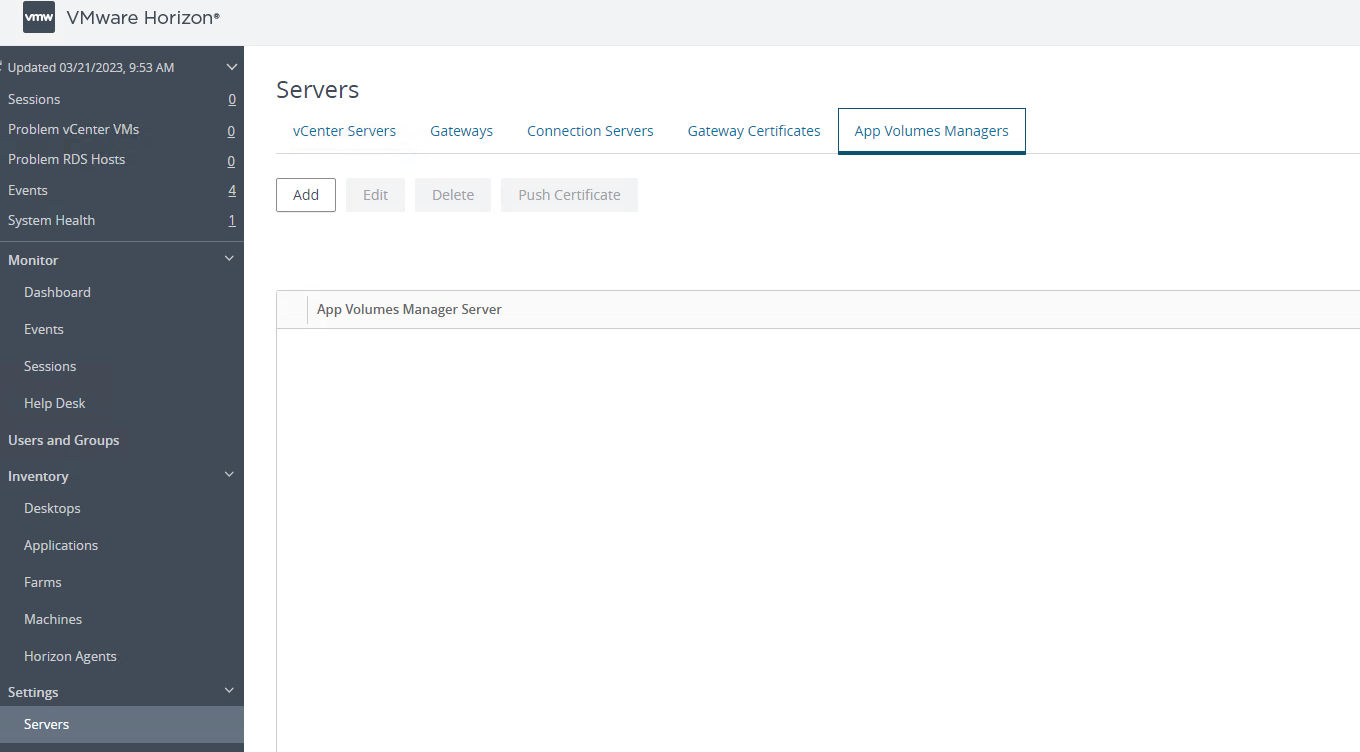
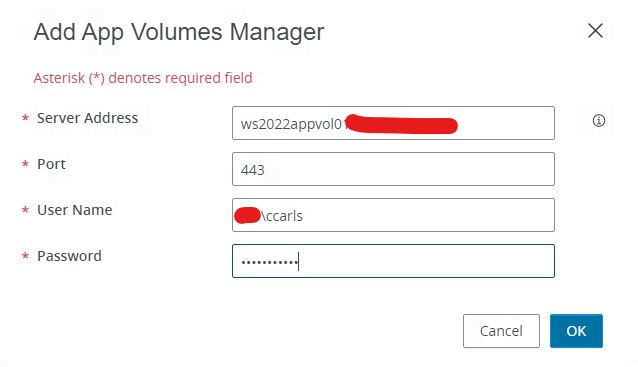
In order configure app volumes apps on demand you must first add an appvolumes manager to Horizon administration console on the connection server. Once logged go to Settings>Servers>App Volumes Mnagers Tab> Add
After hitting the add button you will see a tooltip and if you click on that it will say “Before you add app volumes manager to horizon connection server, install a valid SSL certificate signed by a trusted CA. n a test environment, you can use the default, self -signed certificate that is added to the truststore” So, before adding your app volumes manager to the connection server, it is recommended to have a valid certificate, so lets enroll with a trusted CA. However, if you want to use the self-signed certificate. Import the certificate into the trusted root store of the Horizon connection servers. Then restart the connection server service. You can find more information below on how to find that certificate and just import them into the trusted root certificate store of the connection server.
For this I am going to create a new certificate template on my certificate authority which happens to be a Microsoft certificate Authority. Navigate to Certsrv console> certificate templates>manage templates.
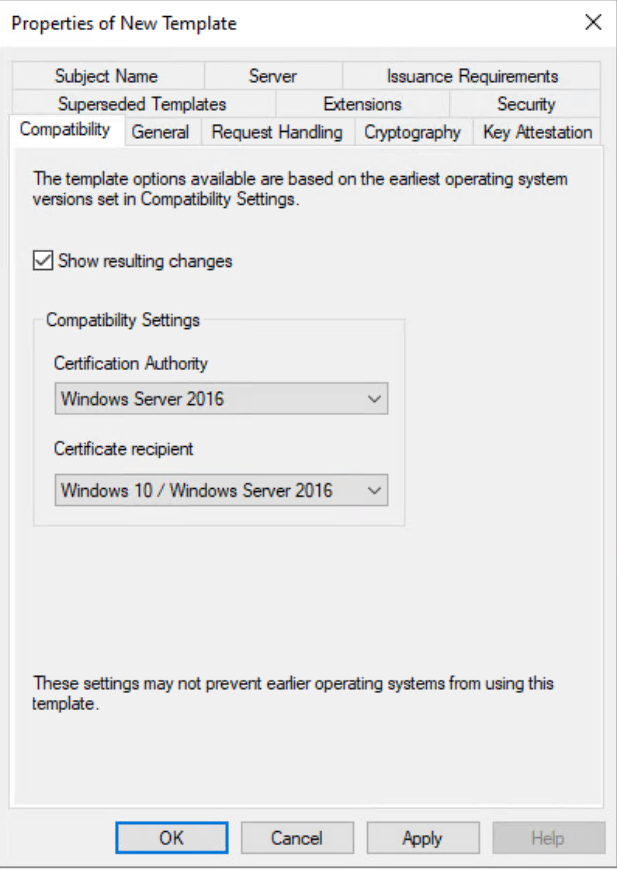
Next I will duplicate the web server template with the following settings.
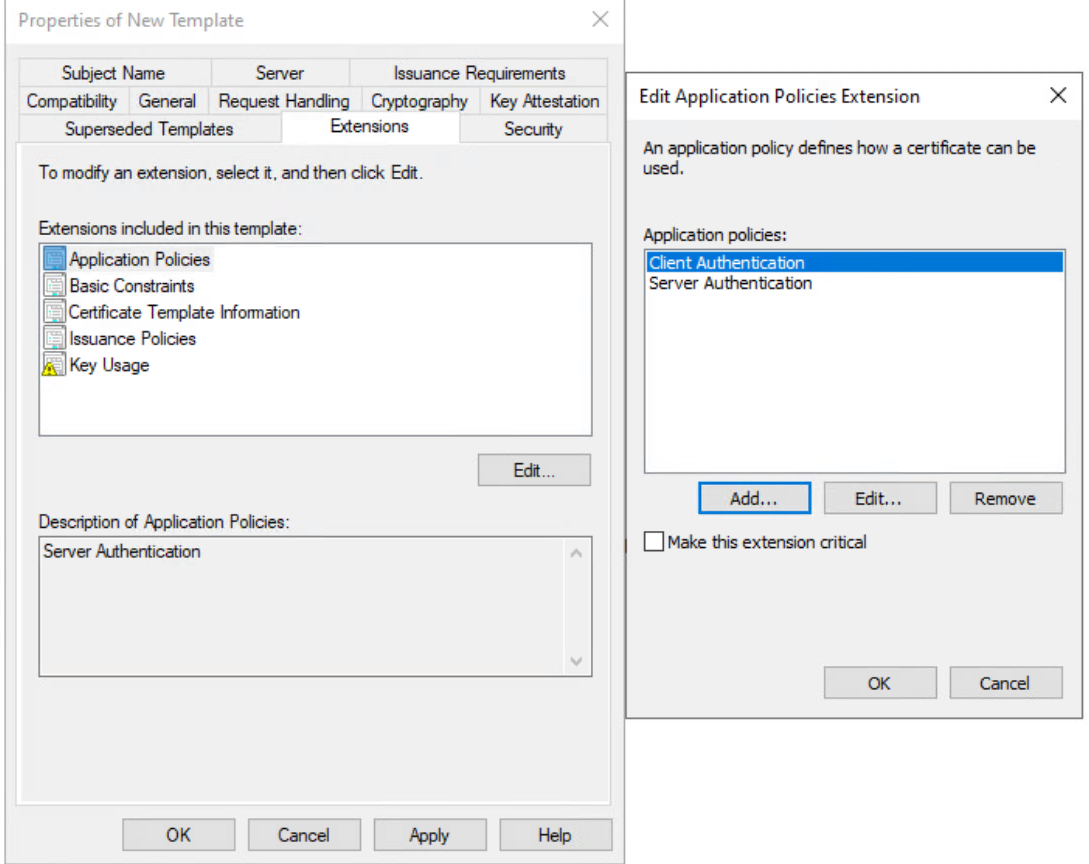
Edit the Application Policies and add Client Authentication
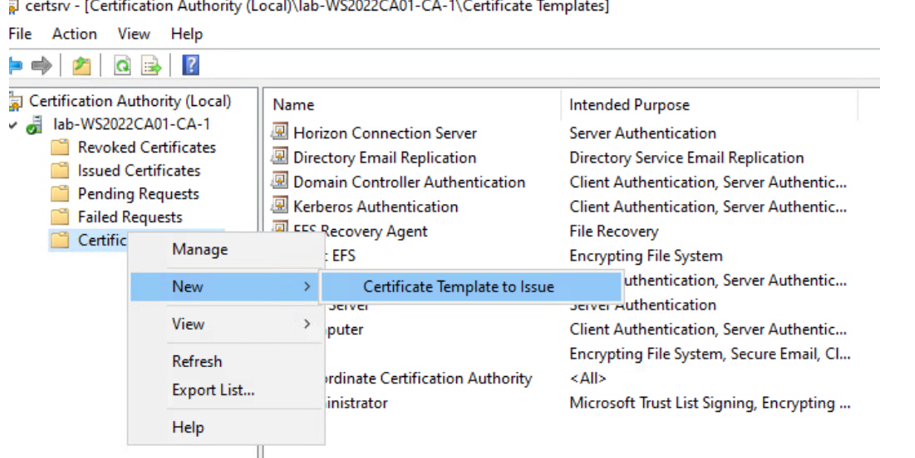
Navigate back to certsrv and right click the certificate templates and click New Certificate template to issue and select the app volumes template previously created and click ok.
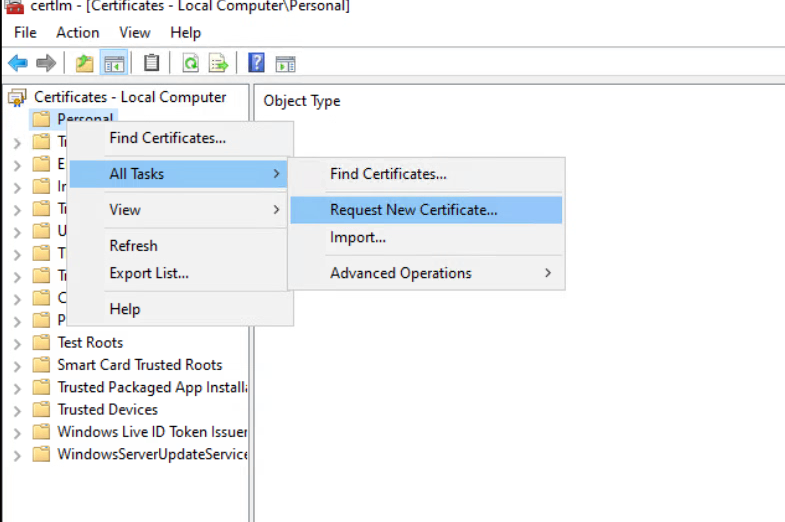
Now that you have the template you can create a new certificate from that template to use for App Volumes Manager. For this instance, I am going to log into the app volumes manager windows VM hosting the server and generate a certificate. I start by typing in the search menu cert then you should be able to find the certificate mmc snapin for the local server.
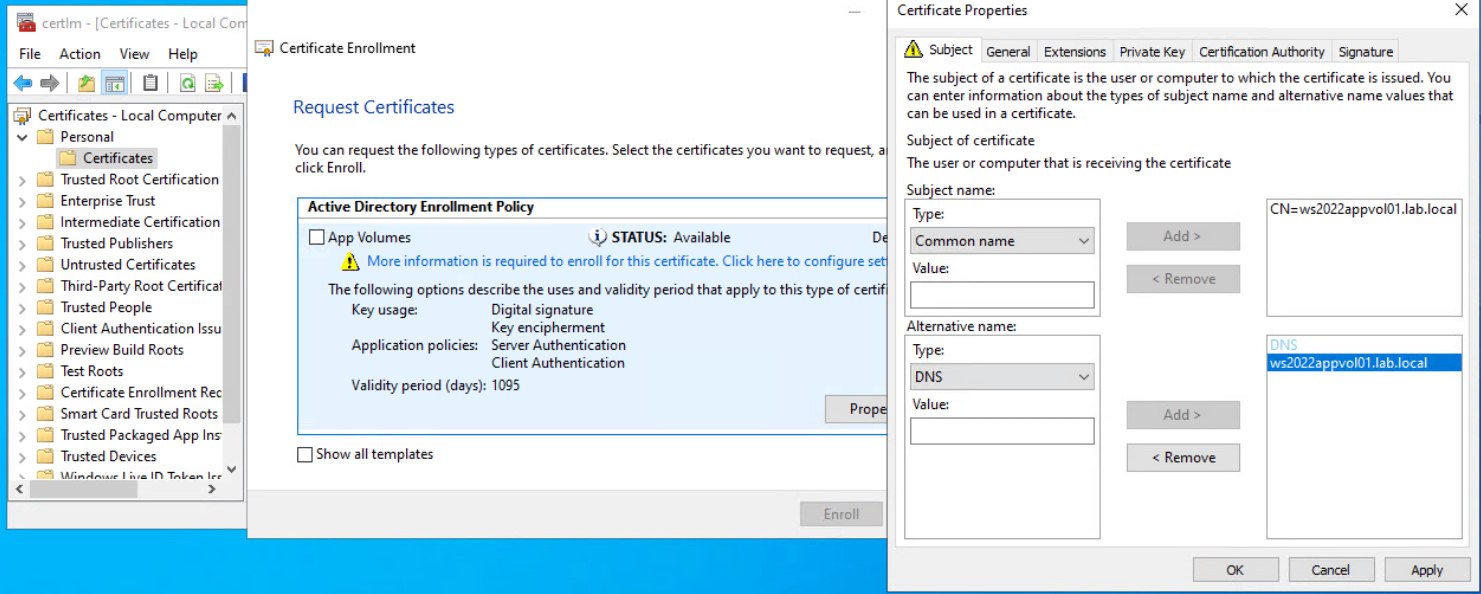
Enter in the following information under common name enter the server name or load balanced name if you have more than one server (LB example ws2022appvol00.lab.local or whatever you want it to be) I put in any of the additional servers FQDN’s below. Also make the private key exportable. Click Enroll.
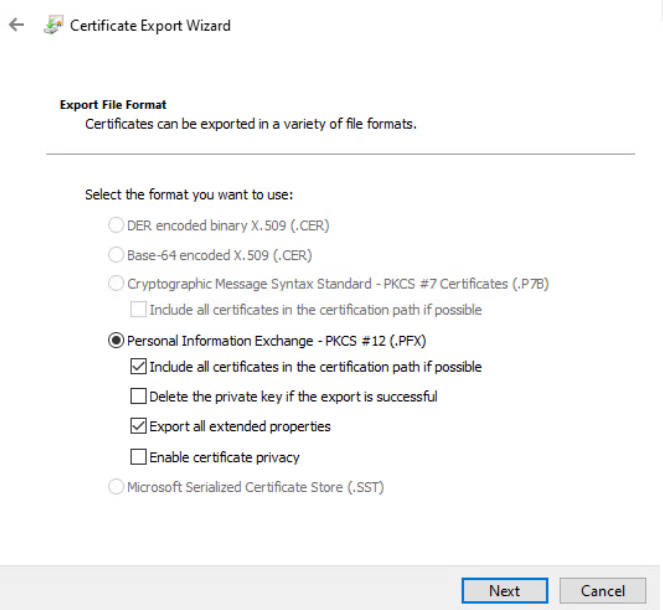
Now that you have created a certificate you now have to export the certificate. Follow the wizard and select yes export private key option and select the following options in the screenshot below. You will then be directed in the wizard to enter a password (enter password) and to save it to a location.
Once the certificate is exported we can extract the private key from the PFX file and convert the private key to PEM format. Using the commands below with openssl. (this is something that is not part of an os and needs to installed)
openssl pkcs12 –in c:\%yourlocationofsavedfile%\view-appvol01.pfx –nocerts –out c:\ %yourlocationofsavedfile%\appvol.key
openssl rsa –in c:\ %yourlocationofsavedfile%\view-appvol01.key -outform PEM –out c:\ %yourlocationofsavedfile%\vappvolpem.key
openssl pkcs12 –in c:\ %yourlocationofsavedfile%\view-appvol01.pfx –clcerts –nokeys –out c:\ %yourlocationofsavedfile%\appvolpem.crt
After that is complete you should have the following files. We will now be able to take these files and copy them to the appropriate server.
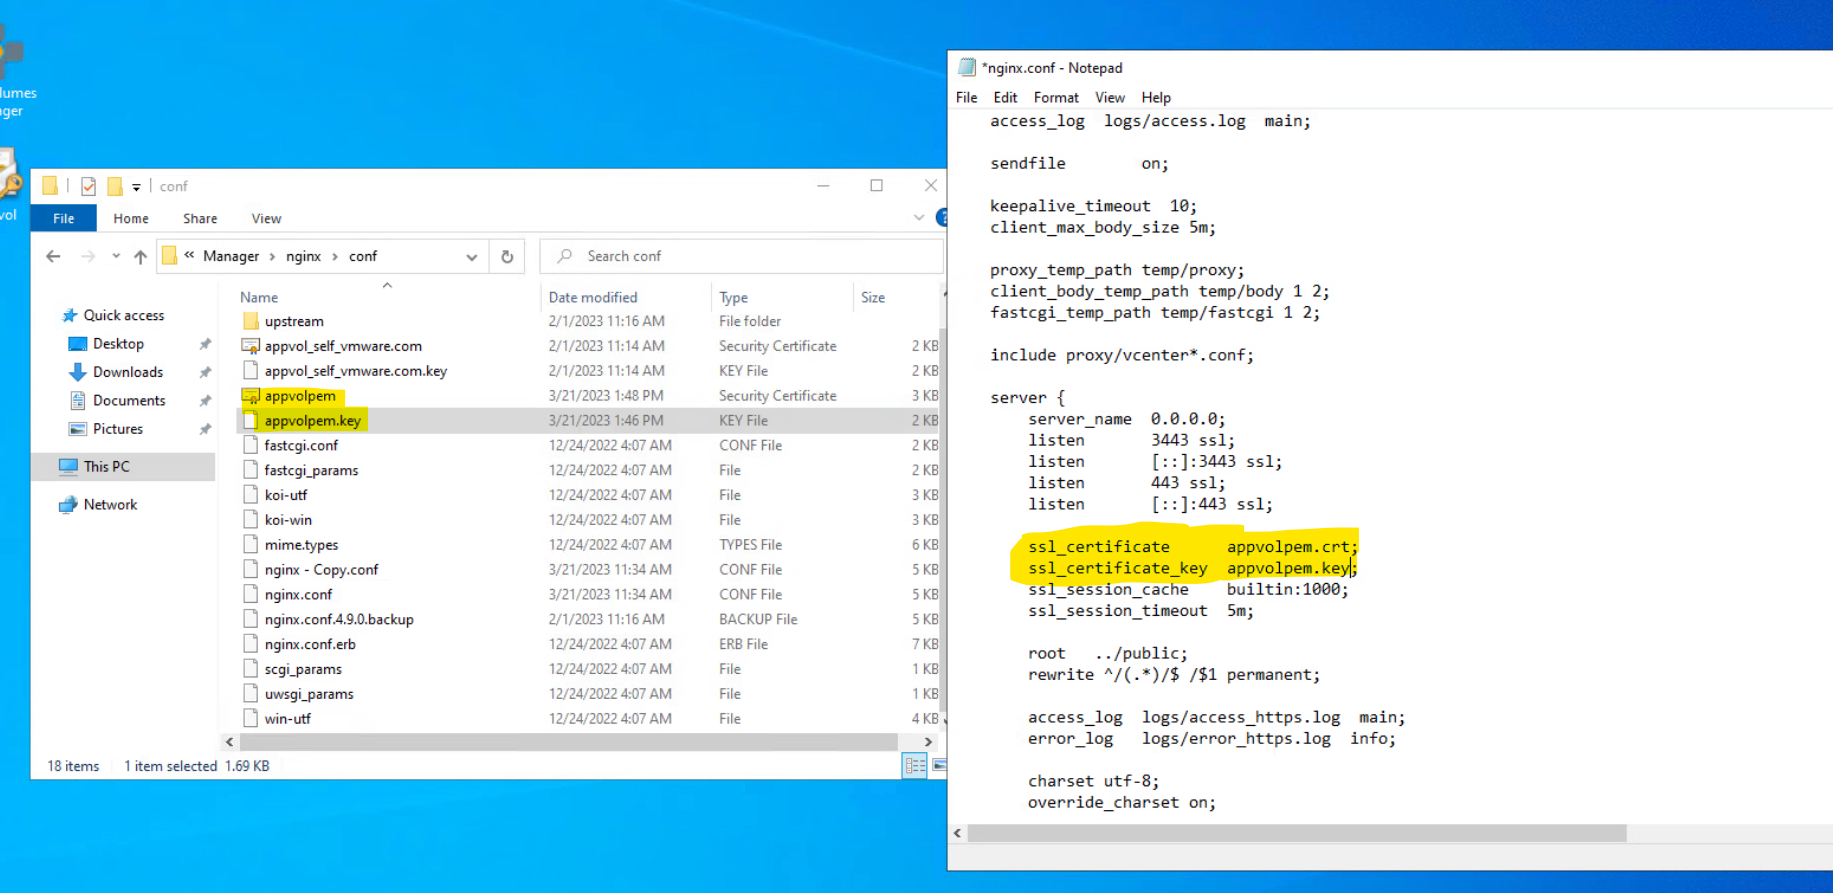
Next you will need to stop your app volumes services and copy the appvolpem.crt and appvolpem.key files into the app volumes manger’s directory(default: C:\program files(x86)\Cloud Volumes\Manager\nginx\conf). After they are copied into the appropriate directory change the nginix.conf file (make a backup copy of this file somewhere. I copied the file to my desktop modified it and replaced it in the directory) once the config file is changed to your new certificate’s names and saved the file you can start the previously stopped services.
Now go to your horizon connection server and add in a service account ideally like lab\appvolsvc that has administrator privilege on vcenter.
And that is it! In my next article you will be able to associate app volumes with a farm.
Horizon 2212 New Feature App Volumes Apps on Demand Overview and Configuration Part Two

